Markers > Usage
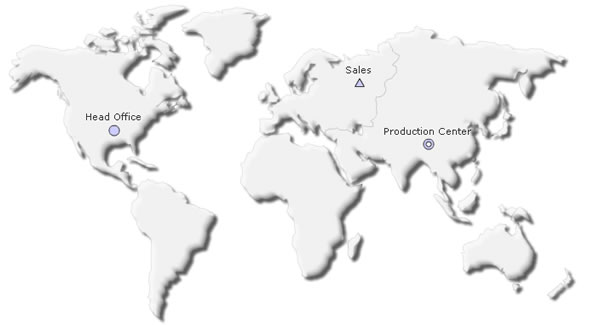
Here, we'll see how to define markers for our World Map to create the 3 office location example, as shown below. Basically, we'll create the following three markers at required locations:
- Head Office
- Sales, &
- Production Center

The following steps are required to define and apply markers to any map in FusionMaps Suite:
- Define the markers using the visual GUI
- Apply (use) them on the map, either using the visual GUI or using XML (if you're generating dynamic data-driven maps).
- Configure the cosmetic properties of each of those markers.
- Or, if you wish to define custom shapes or load external images, define custom marker shapes.
In this section, we'll cover points 1,2,3 & 4. So, let's first get started with visually defining the markers.
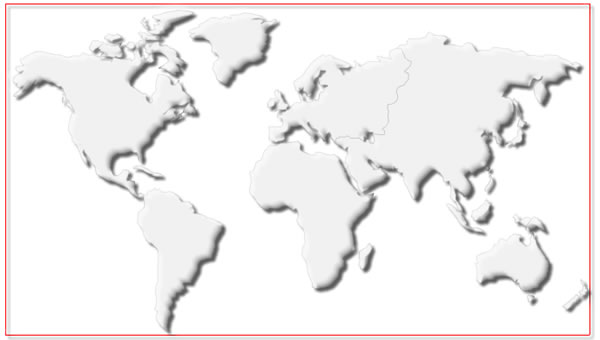
To define the markers, you'll need to run FusionMaps GUI. So, launch FusionMapsGUI.html from Download Package > Tools > GUI folder. You'll get a screen asking you to select a map from the drop down list. Select the required map from the down list - World Map in this case. The World Map would now load in the GUI and you should be able to see the other GUI tabs.
If the World Map does not load, or you get a JavaScript error, you need to make sure that Flash Player permissions have been properly set to enable JavaScript to access the map. To configure the Flash Player Settings, you need to go to the Settings Manager at Adobe's website. There, add the folder Tools > GUI (from which you're running the GUI) as a secure location (Always Allow).


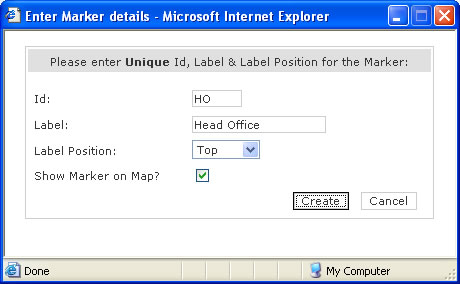
Here, you need to enter the following information:
- Id - Each marker needs to have a unique ID (alpha numeric), by which it will be identified on the map.
- Marker Label - This label would show up beside the respective marker.
- Label Position - Where the label should appear with respect to marker? Possible options are top, left, bottom, right & center.
- Whether to show this marker on map or not? If you check this box, this <marker> will be shown on the map by default.
Feed in the required information and click on Create button. That completes the creation of our first marker.
When you now scroll down in the Markers Tab, you'll see that this marker has been added to our list of markers, as shown below:

As you can see above, the new marker now appears in the list. Here, you can modify the marker's label, label position and whether to show on map. Additionally, you can also choose one of the four possible default shape for this marker - circle, arc, triangle or diamond. Or, if you need to delete this marker for some reason, you can do this by clicking the delete button.
FusionMaps also allows you to define custom shapes or use image icons for each marker. We'll see how to do that in next section.
Now, if you're curious to see this marker before defining any other markers, just switch to Preview tab, and you'll see that the new marker is now present on the map with the required label. Easy - isn't it?
Similarly, define the other markers on the map by clicking at the required locations and adding the labels and positions, till you have all your markers on the map. Once the definition is done, we now need to get the XML data for these markers back.

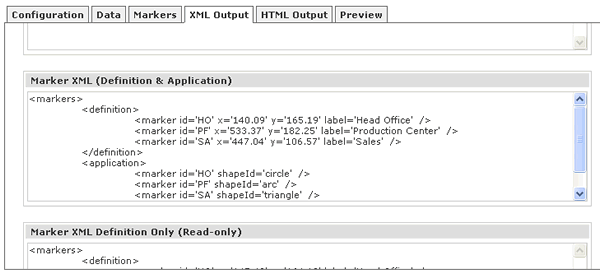
As you can see above, the GUI has generated both the <definition> and <application> code for our defined markers. You can now directly copy this and use it in your applications.
Or, if you just want the definitions of the markers (without application, so that you can apply dynamically from your code), you can use the code from fourth text area in this tab - titled "Marker XML Definition Only". This text area contains only the definitions of the markers. To apply any marker, you'll need to manually place them under <application> element with proper ID matching.
To make your lives easier, we've created marker definitions for important cities in the most of the maps and provided them as XML to you. You can re-use the definitions from those XML files present in Download Package > MarkerXML folder.
Before we move to defining custom shapes for markers, let's now study the XML code generated for markers. Using the XML code, you can render a lot more functionalities than possible in this GUI.